Project: Electronics Bash - Arduino #9 - Batteries

In this stream, we'll be looking at:
- Different battery chemistries, and their ramifications for portability, charging, weight, and output
- Advantages and disadvantages for each type in an Arduino project
- Using voltage regulators to provide a stable voltage to your Arduino
- Using voltage dividers to measure voltages higher than 5V.
This is the space where I'll be posting code samples and circuit layouts sometime in advance of the stream, for those who want to follow along more directly. You can expect the code and formatting here to change up to a couple hours before the stream as the plan for the evening comes together.

Batteries
None of the code related to battery usage will be terribly complicated - we'll be mostly making use of the Analog Read function and the Serial monitor.
Build Together - Sensor Monitor
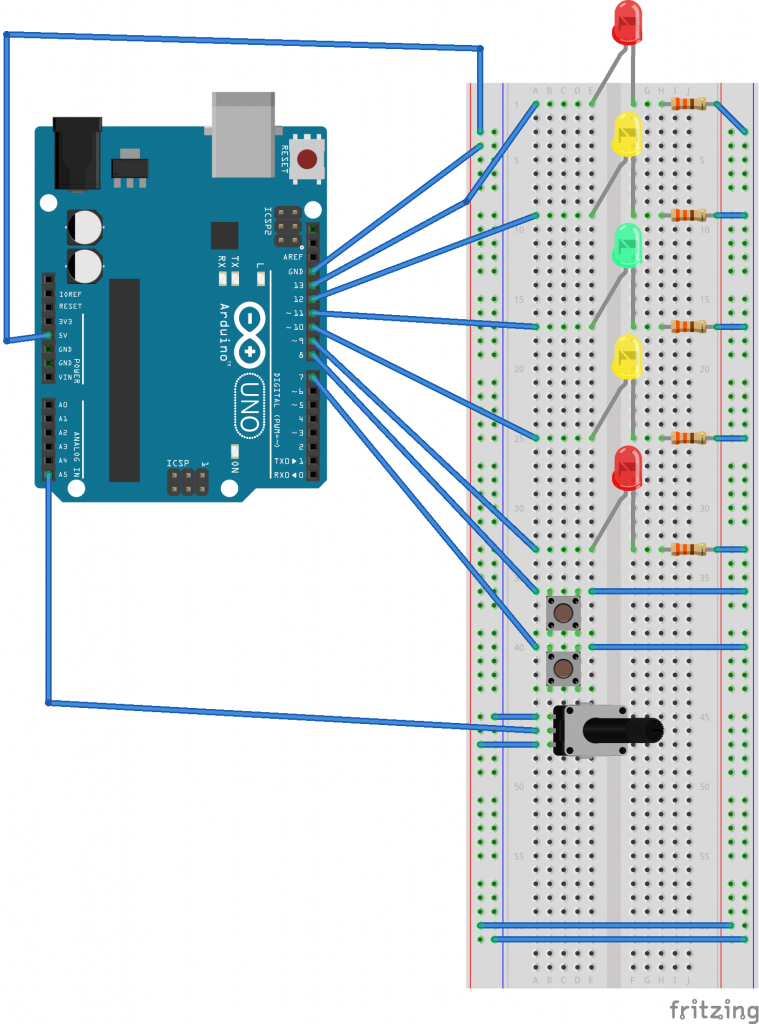
Next week, we'll be looking at some fundamental coding patterns using some simple components that everyone should have in their starter kit, plus one additional sensor or switch. Below is a bit of starter code to test root components (LEDs, buttons, potentiometer) as a place to start
LED Testing
Try this code after installing the 5 LEDs and their resistors, to make sure they all work:
Click here to view code on GithubLEDs and Inputs
Once the LEDs, buttons, and potentiometer are installed, this bit of code tests them all. The 5 LEDs should chase a a speed determined by the position of the potentiometer, and the buttons should set the direction of the chase:
Click here to view code on Github