Arduino Pro Mini DMX Shield
Published May 20, 2019
Introduction
In my dayjob as the lighting supervisor of a midsize regional theater, we get to play with all kinds of fancy (and expensive) lighting equipment - moving lights, high-power color changing LED units, ultra-compact wireless dimmers, and so on. But it's also fun to build inexpensive, maker-size versions of of this equipment, and it can be done on a shoestring budget.
About a year ago, I built a couple versions of tiny moving lights - one directly from a design from Thingiverse, the other of my own making. The end result was super cute!
The thing with this tiny light compared to real moving lights was... I cheated a bit. The light itself only contains the servos and LED chip itself, while the controller, LED driver and ballast were all external. The full setup took up almost 3 times the volume of the individual light:
Not only did I cheat on size, I cheated on control a bit too. The unit has a number of 'test' modes that run simple movement and color patterns, but there was no means of controlling the light externally. While there are It was basically a fancy keychain toy. And there are DMX Shields in the Arduino Uno form factor, they themselves would have outsized the lights by another 200%. It was all getting too bulky to be reasonable.
But after many months away from this project, I've been devoting some time to scaling down both the dimming and DMX control sides of the circuitry. The result is a shield for an Arduino Pro Mini.
DMX
As described in my previous write-up of contemporary lighting control protocols, the core standard for modern stage and event lighting is DMX, or properly, ANSI E1.11 DMX 512-A Digital Multiplex. In short, DMX is a serial protocol and physical spec that caries up to 512 one-byte values over each individual cable, usually with 5-pin DMX connectors. One set of 512 values is termed a "universe," and to carry additional values, additional cables carrying different universes of information may be added.
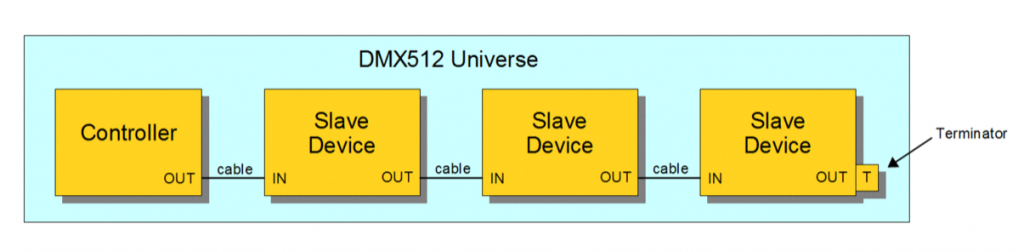
More formally, DMX is a 250 kbps serial protocol transmitted over a 2-wire bus following RS-485 standards. The ESTA standard standards also dictate standardized connectors (XLR5 for temporary installations, RJ45 for permanent infrastructure), network topologies, impedances, terminations, and so on. The standard is pretty readable, if you enjoy that sort of thing.
DMX was developed in the late 80's/early 90's as a replacement for systems in which lighting equipment was controlled via analog control voltages, meaning each parameter (each individual dimmer, say) required one wire. A rack of 96 dimmers would have 100+ pin wiring harness attached to it, each with an analog voltage specifying level. With the introduction and adoption of DMX, all that was replaced with a single 3-conductor cable. All modern stage lighting controllers speak DMX, although most rely on transporting universes of DMX over Ethernet and using 'DMX Nodes' to turn that digital data back into 'hard' DMX close to the fixtures being controlled.
Circuit Components
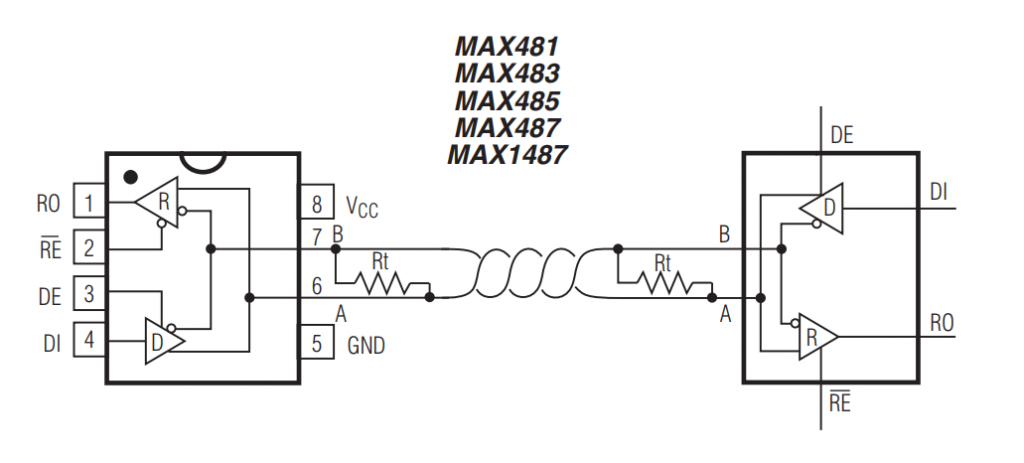
There is really only on piece of hardware required to add to an Arduino-compatible design to allow it to send/receive DMX: an RS485 transceiver chip. There are many of these on the market, the common ones being the MAX485 and the SN75176.
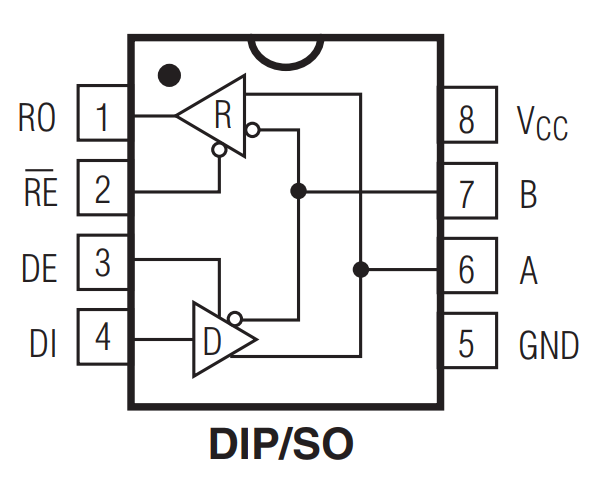
These take a single-ended input and turn it into a balanced output or, conversely, receive a differential RS485-compatible input and convert it to a single ended signal to a microcontroller. There are two control pins which determine whether the chip is a receiver or a driver. The control circuitry is essentially the same at both the transmitting and receiving end:
A more sophisticated/robust approach would also incorporate an optoisolator to prevent the processor from being damaged by faults on the signal side. There are some good guides on the interwebs on setting up optoisolation with DMX for an Arduino (Mathertel.de has a good write up of their isolated DMX shield), but for the sake of quick progress I'm making this a future goal.
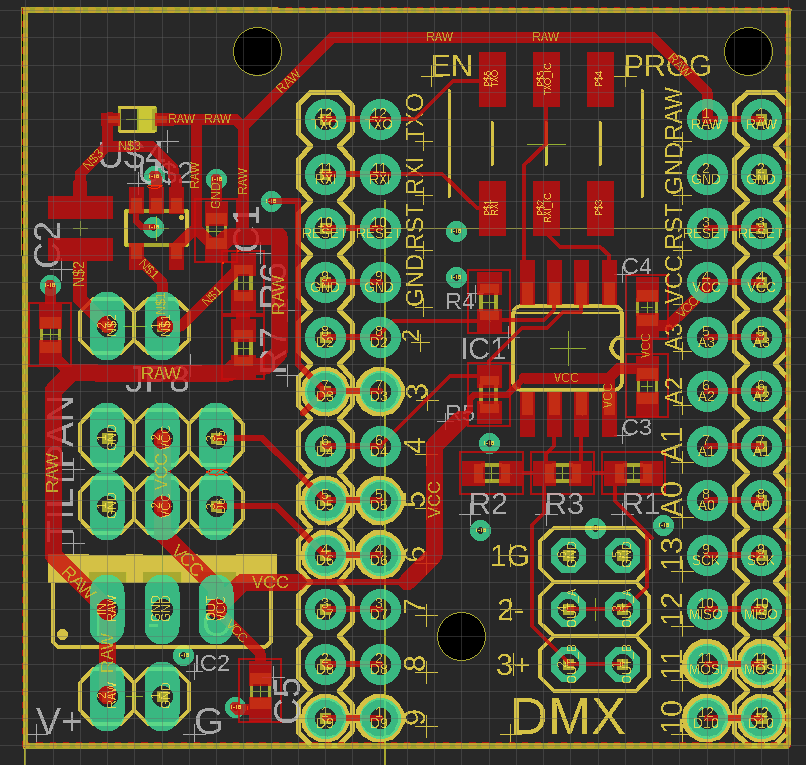
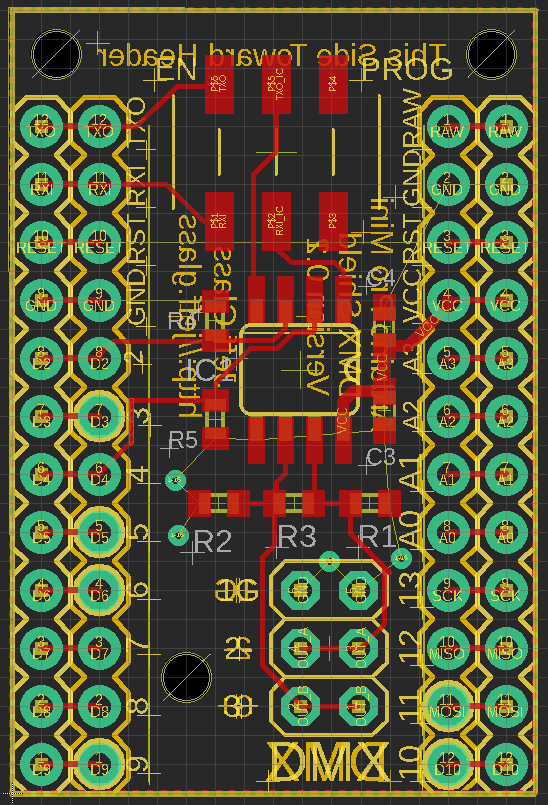
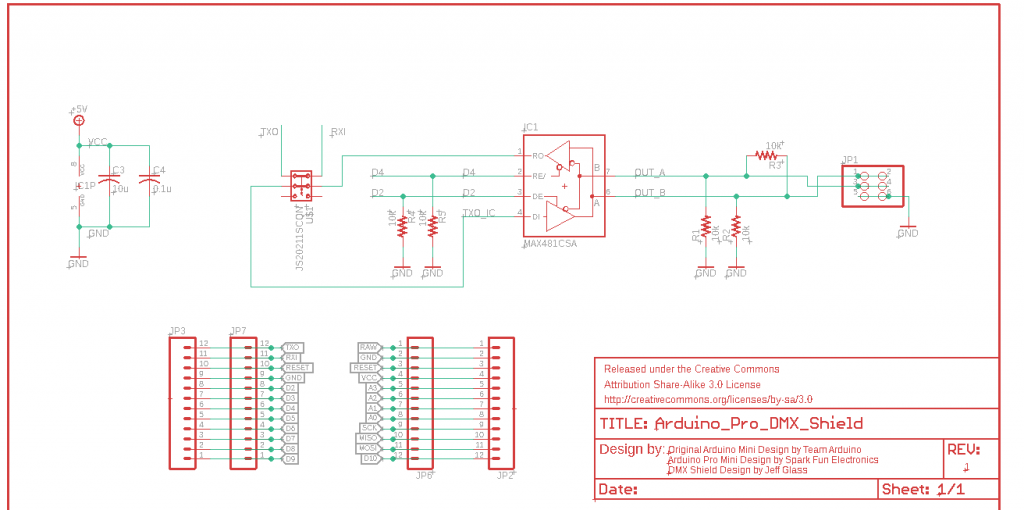
Circuit Layout and PCB Manufacture
The circuit is ultimately very simple - a couple headers, some resistors, a MAX485 IC, and some pads to connect the DMX connectors to. And a switch - the DMX library I'm using abuses the Arduino's built-in Serial library for some of its functionality, which means it has to use pins D0 and D1. Which means you can't reprogram the Arduino with DMX coming in. The DPDT switch just removes the connection between the DMX connectors and pins D0 and D1 of the Arduino to allow for programming.
Mostly for my own reference, the connections between a standard XLR3 or XLR5 connector and the Max485 pin are:
| Net Name | XLR Connector Pin | Max485 Pin |
|---|---|---|
| GND | 1 | 5 |
| Data - | 2 | 7 |
| Data + | 3 | 6 |
Here's what draft one of version 0.1 looked like when it came back from OSHPark and following assembly
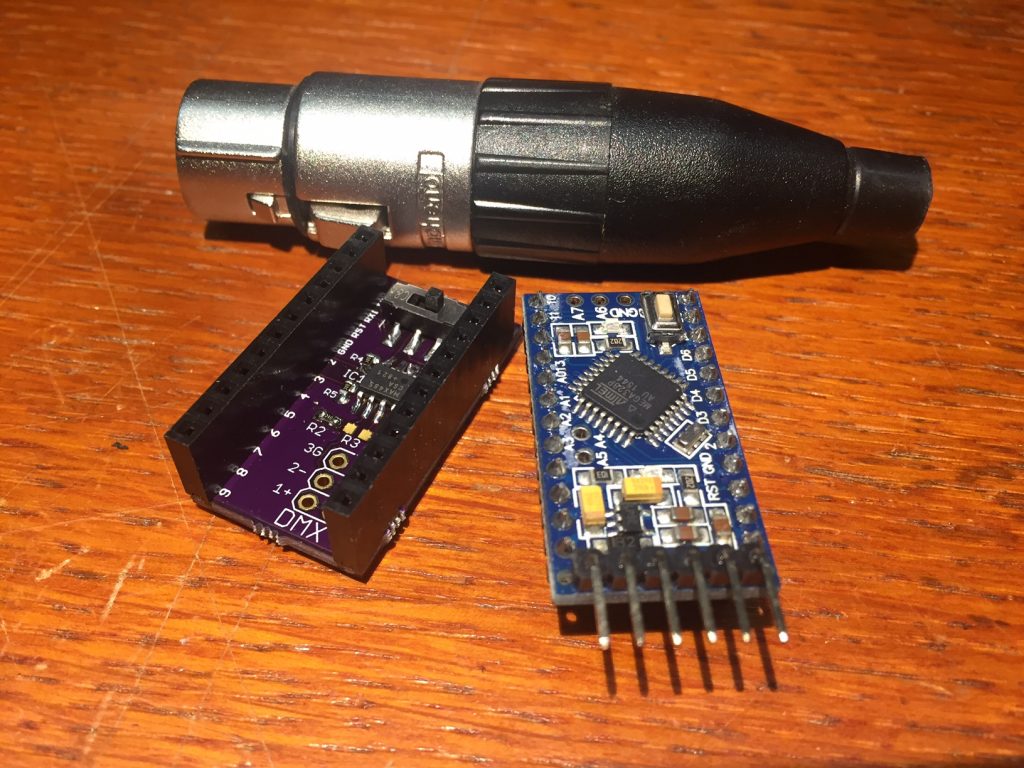
All the passives are 0603 and the max485 is an SOIC, both of which are pretty easy to solder by hand. The SMD switches are adorable! They're these little guys from C&K.
The major flaw with version 0.1 is: one you've attached headers, where do you attach anything else?? So version 0.2 added an additional row of thru-hole pads, cleaned up some labeling, and added some mounting holes for M2 screws:
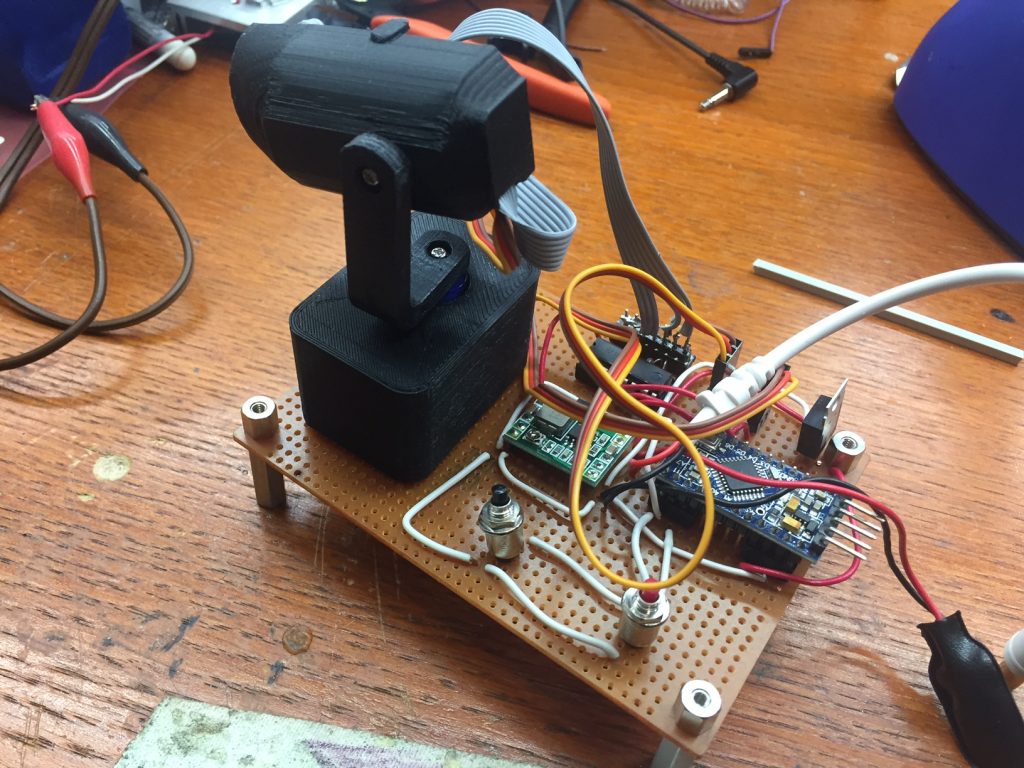
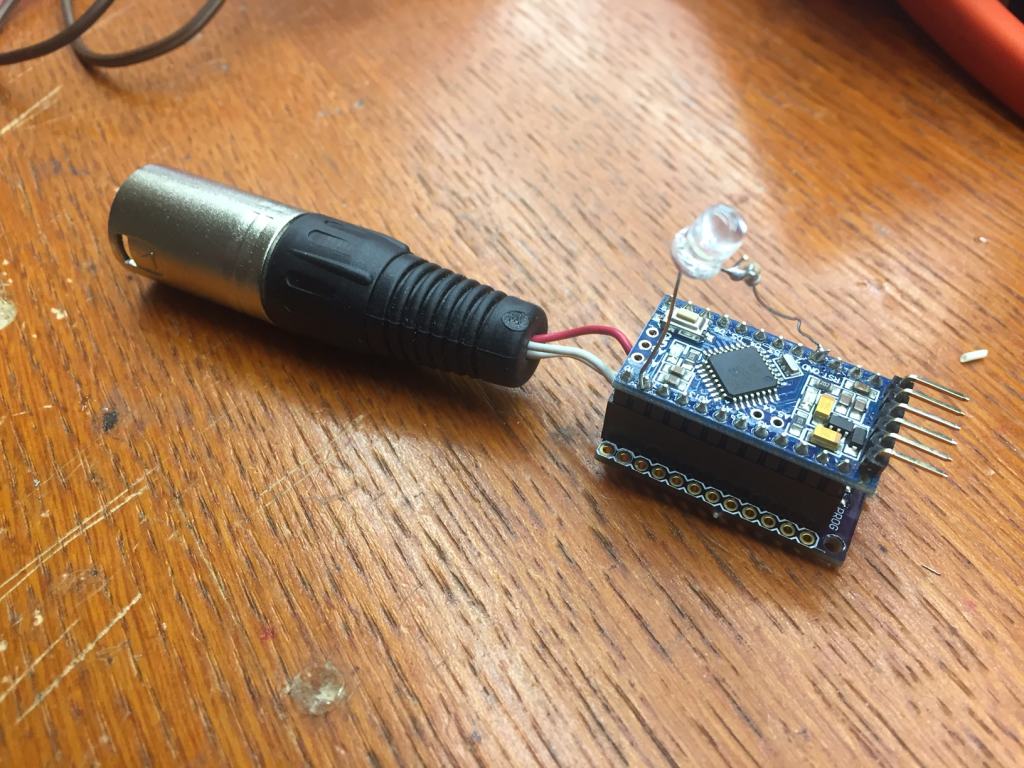
And once its all assembled, it looks something like this:
Programming
I've been making use of the Conceptinetics DMX library, which I've found to be both functional and stable. I haven't yet experimented with the RDM capabilities of that library.
The library is very easy to use, and its usage is described well on the Conceptinetics Documentation page. Essentially, one defines a DMX_Slave object, which has enable(), setStartAddress(), and getChannelValue() methods.
For example, once the object is set up and addressed, a loop() with the single command analogWrite(LED_PIN, getChannelValue(1)); will dim an LED attached to pin 9 dim in response to incoming DMX. Easy as pi.
Usage
So, what can one do with an Arduino Pro Mini that can receive DMX? Well...
You can make a DMX level monitor, a DMX controlled LED source. And really, anything else you can think of to do with an Arduino - drive servos, WS2812s, solenoids, relays...
The shield can also transmit DMX, though I haven't thoroughly tested this yet. But it's possible to make a miniature DMX controller, itty bitty light board, or testing tool. Or wire up some interesting input devices and make an interesting lighting controller.
What's Next
The shield has been a useful proving ground for the Conceptinetics DMX library (though we've used it onstage before), as well as for OSHPark's manufacturing tolerances. I wasn't sure that having holes as close to the edge of the PCB as both V0.1 and V0.2 have would be manufacturable, but they came back no problem.
This all started for me with a miniature moving light project, and while that's not quite ready for a write-up, I'll just leave V0.3 of the DMX shield here. Not without errors/improvements to be made, but I'm excited to try out some new LED dimming tech: