3D Printing in the Home Workshop
Published March 9, 2019
With the bulk of the shelving and organization overhaul complete as of last week, I've spent the last week starting to personalize my home workshop space, mostly using my 3D Printer. This is definitely a situation of "when your favorite tool is a hammer, everything looks like a nail." And the 3D printer is an awfully nice hammer...
There are some things that 3D printed plastic parts are perfect for, including:
- Brackets to attach/connect unusual shapes
- Containers/guides for specific materials and tools
- Stands and supports for lightweight goods
But of course, there are some properties that 3D printed thermoplastics are always going to be underachievers in, like:
- Brute strength (compared to metal or wood)
- Tiny mechanical details (like screw threading)
- Heat resistance
In my mind, an ideal setup picks and chooses the materials that are right for each job. There's not much point in printing, say, a 24" wide shelf when a wooden one with be stronger, cheaper, and easier to make or buy. Conversely, welding a microphone stand together out of metal would be a nightmare, where it's easy to print an existing plastic design that will hold up just fine.
The thrust of this is that, with the ELFA shelving (wood and metal) providing the backbone of my setup, there's lots of space to fill in the operational edges with 3D printing. I can't possibly cover every print, but in no particular order, here are the new additions to the setup, and some most-useful oldies:
ELFA Corner Bumpers
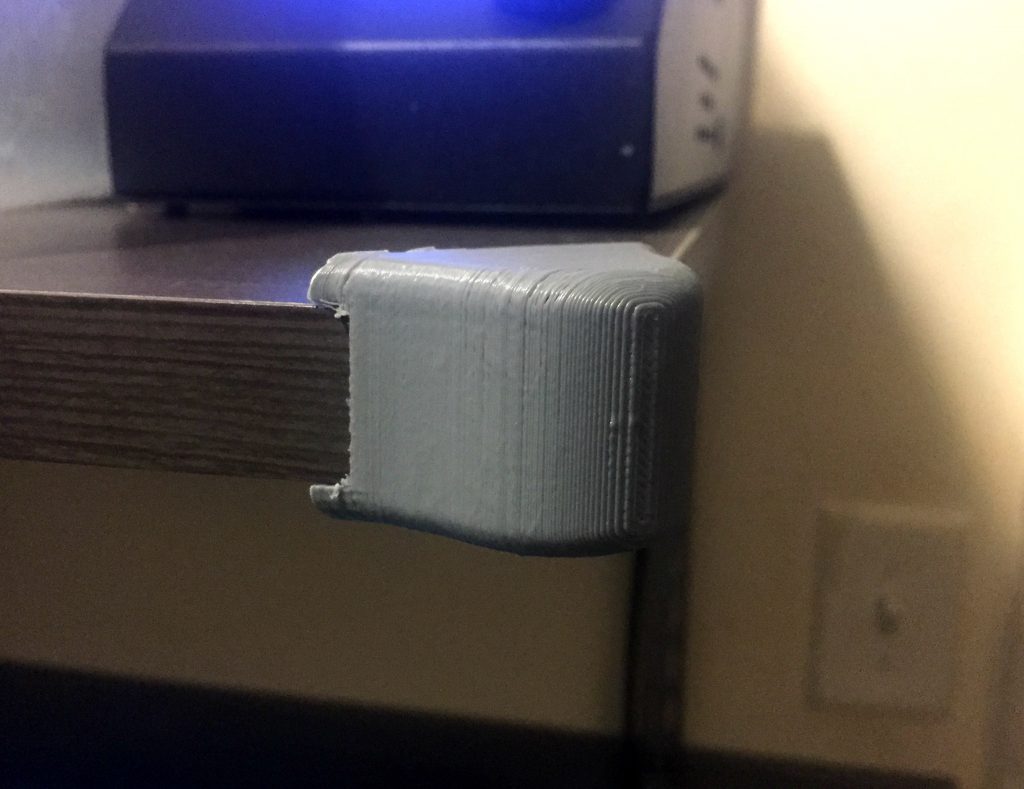
I designed and printed these the same day I finished the shelving install, after my partner nearly beaned herself on the corner of a shelf by the doorway as she was getting up. They're a tight enough fit that they stay out without adhesive or fasteners. The design is now on Thingiverse.
ELFA Cable Guides

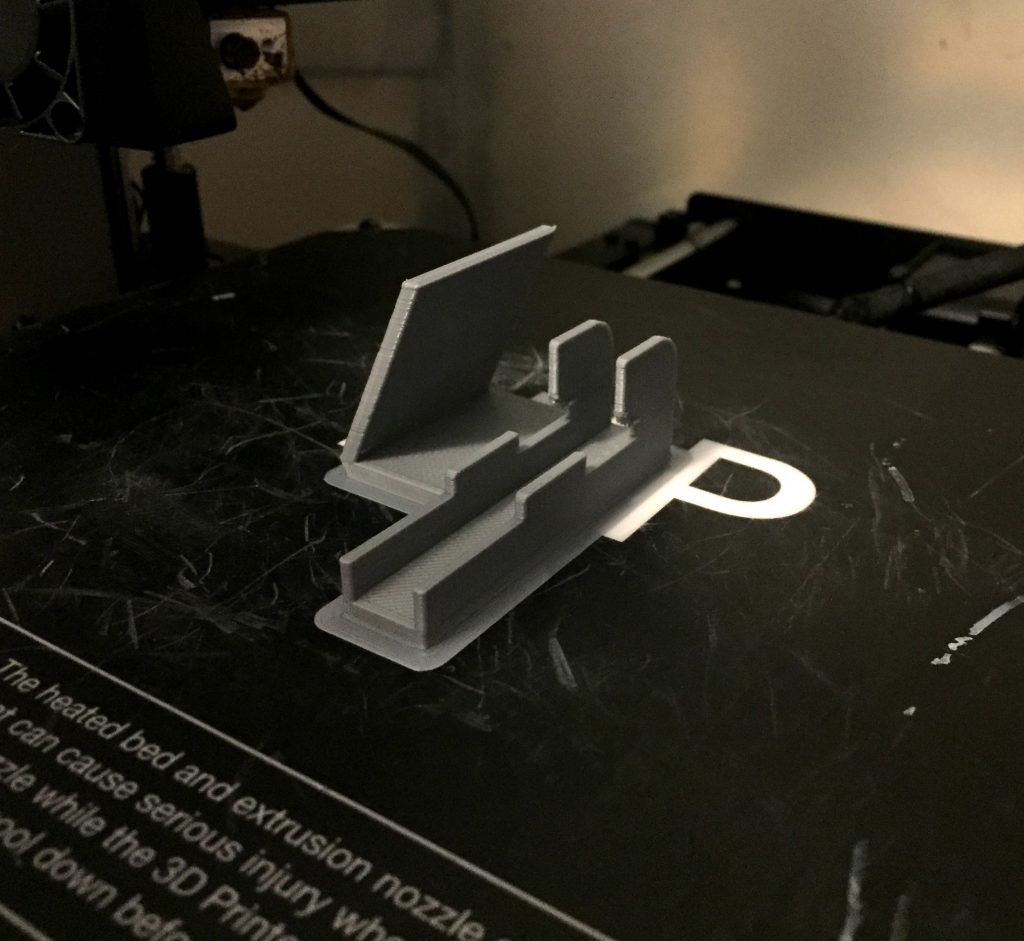
With the number of things that plug into AC power on my bench, I figured cable management would be useful. I started by putting together an ELFA Shelf Hook Profile, which can be used as a basis for anything that hooks into the ELFA vertical standards. I then added an L-hook shape to one side of the profile, which captures any cable that are hooked into it before the piece is installed. This is the result.
ELFA/2020 Bracket
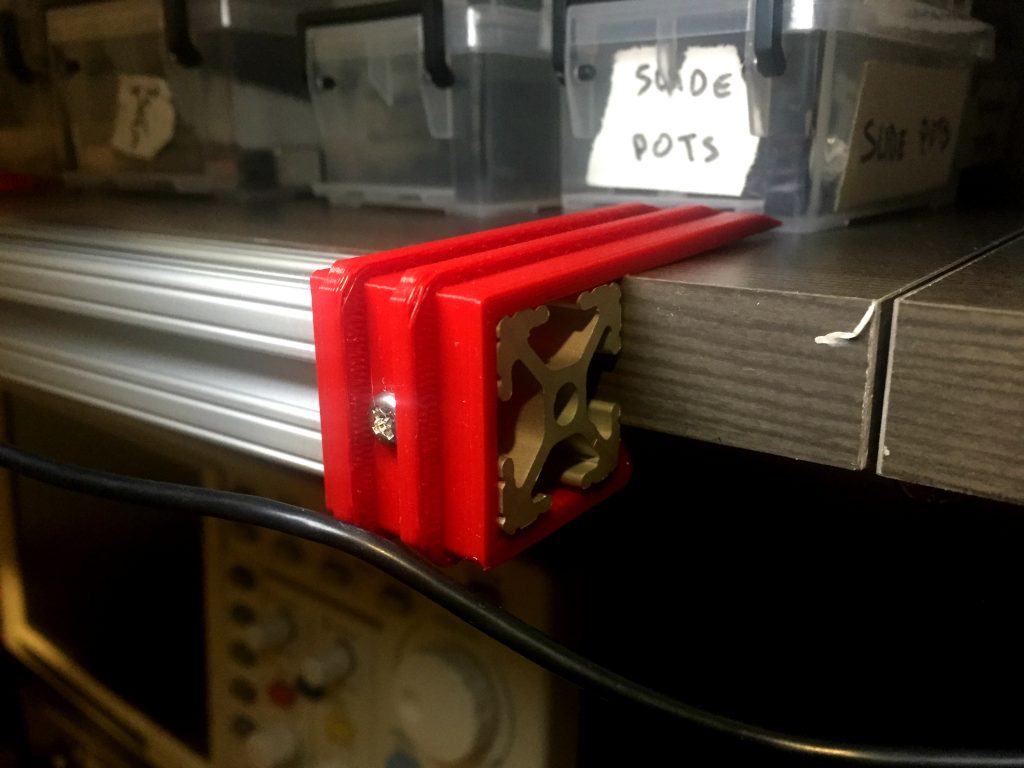
I'm trying out using a piece of 2020 extruded aluminum as a generic mounting rail for some desk equipment, including the camera arm below. Maybe I'm being precious because the shelving is still new, but I couldn't bring myself to put holes into the front of the shelves to mount this rail in place. I designed and printed these brackets, which are a tight fit to both the front of an ELFA solid shelf and the 2020 piece, and further secure to the 2020 with a screw and a hammer nut. A small piece of blue-tak can be fitted to the slots on the underside to prevent the bracket from sliding off.
This will probably need a second draft, as I realized after installation that they don't leave room for the LED lighting I intend to install under each shelf.
Lighting PSU Wall-Standoffs
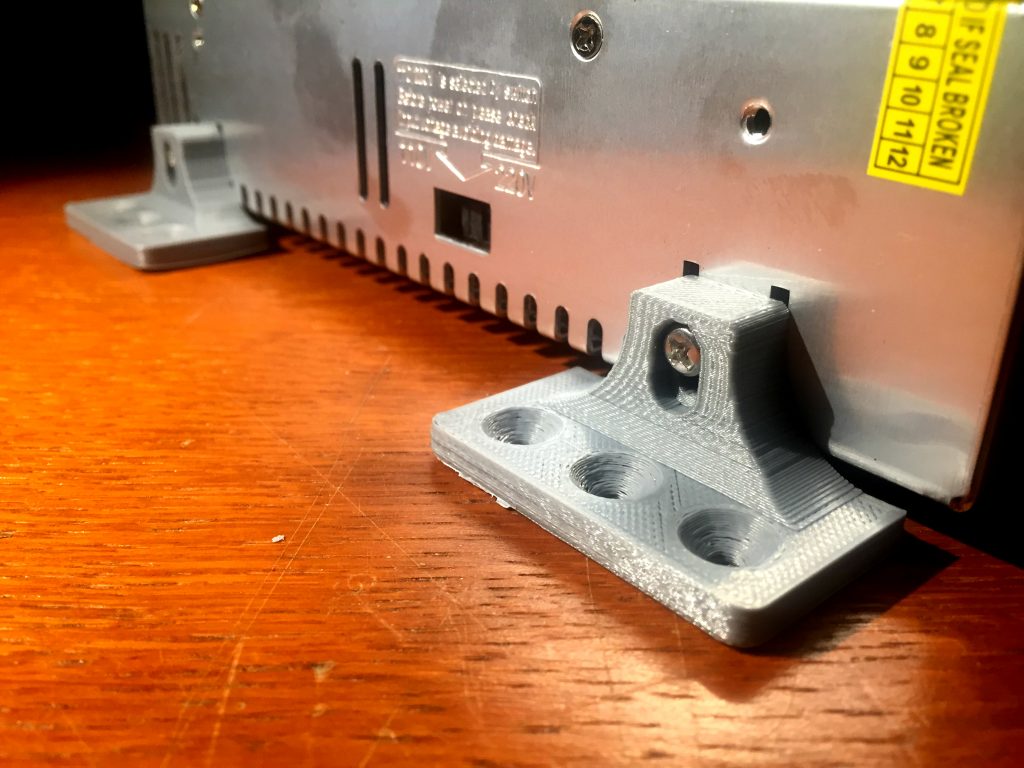
I'll get into the lighting for the room more once all the parts arrive on the slow boat and I can get it all installed. In the meantime, I'm starting by mounting the 30A, 12V PSU. The positioning of the vertical standards on my wall didn't leave an obvious place to mount the PSU, but the unit does have four M4 threaded holes on the sides. I designed and printed these mounts to accept up to three drywall screws each, with a slot and countersink for an M4 screw.
Articulating Camera Arm
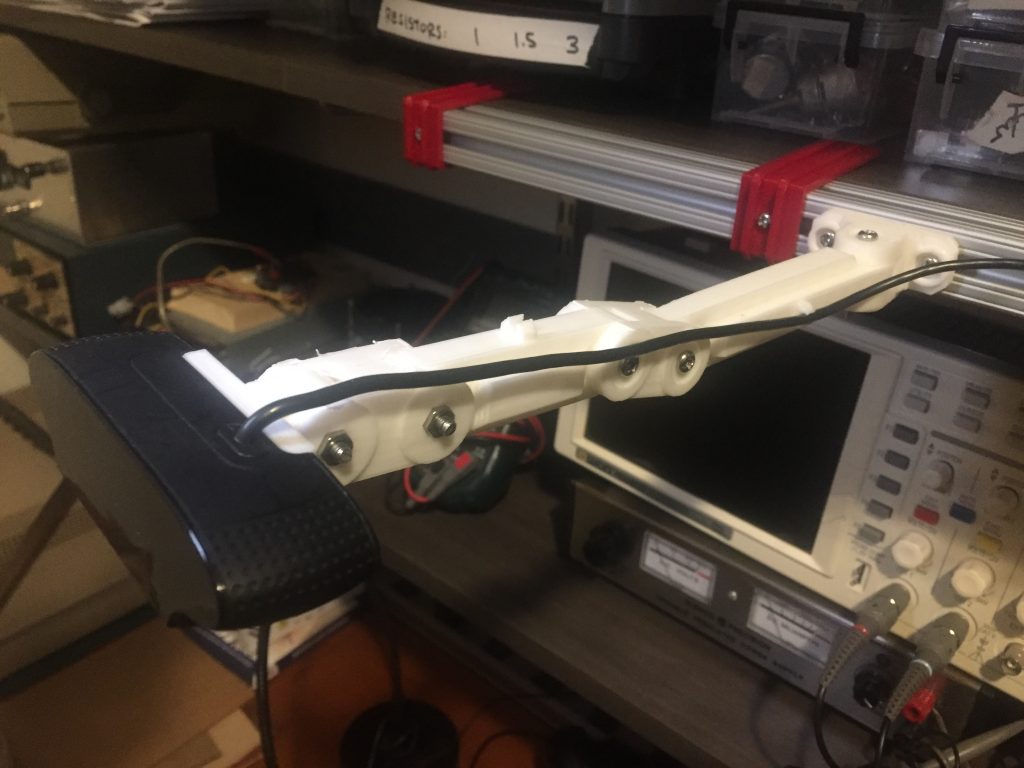
Having a semi-permanent camera on my desk has been useful for project documentation. This is an assembly of two prints by other makers - RaffoSan's Universal Camera Mount and Felwats' C920 Adapter. The adapter actually fully replaces a piece of metal that sits between the camera and its original hinged arm. The arm mounts to the 2020 rail previously mentioned, which is mounted on the front of the lowest shelves.
Oscilloscope Probe Holders
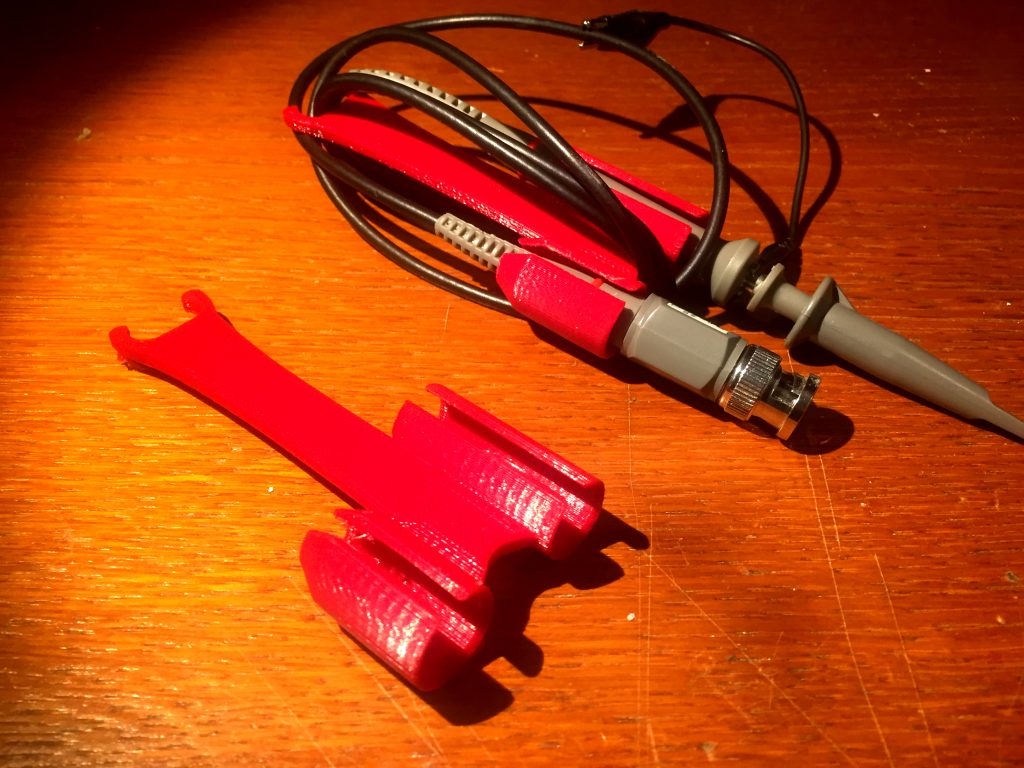
This design popped up on the FunctionalPrint subreddit just in time. I was struggling with what to do with my scope probes - coil them next to the scope, keep them in a bin and pull them as needed... this solves that problem. The design comes from JRucks and is now on Thingiverse.
'Hot Shoe' Microphone Mount
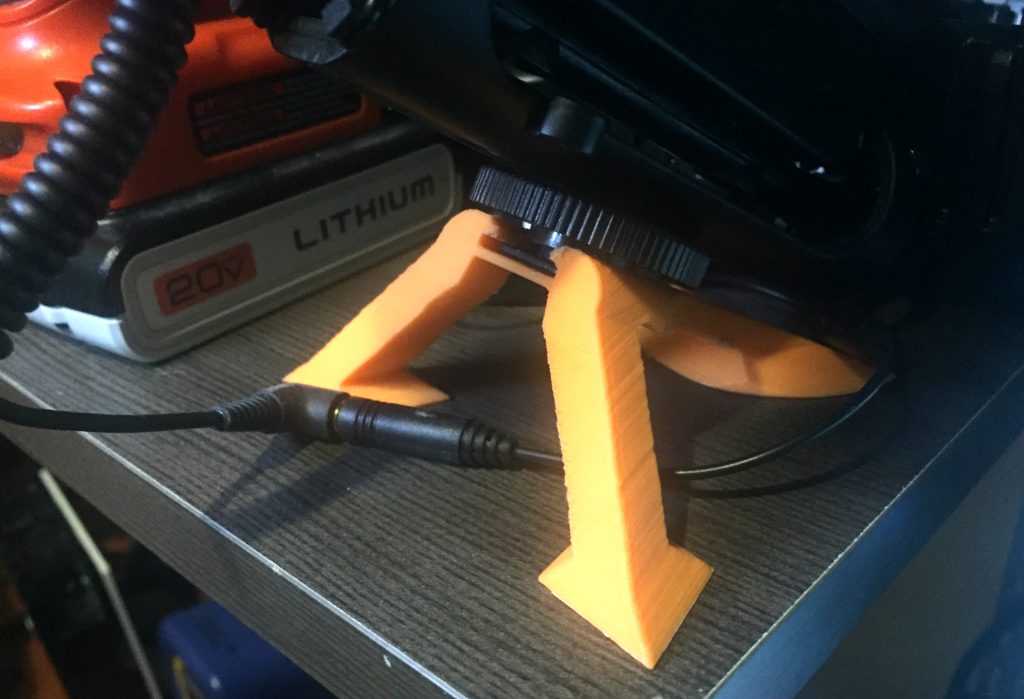
I've had this one kicking around for awhile to hold my cheapy Takstar SGC-598 microphone. It's not the fanciest setup, but for my casual purposes it's more than enough. The design comes from Asgeirom on Thingiverse.
Solder Roll Holder
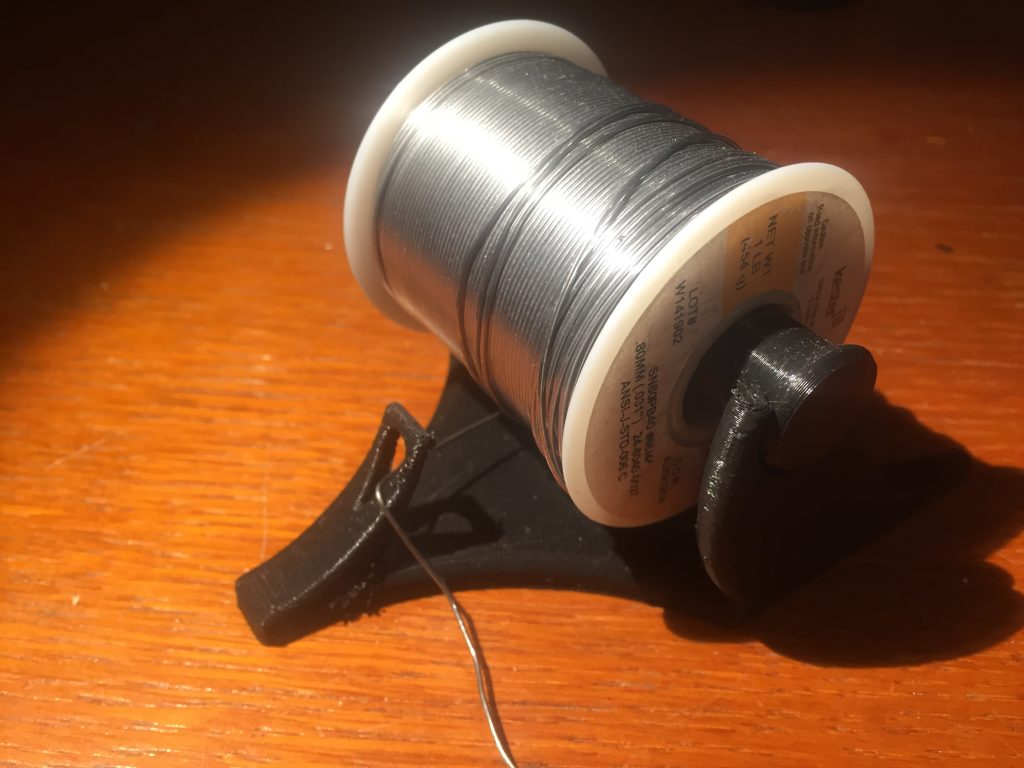
I didn't really see the point of having a solder-roll holder until I printed one. Never again will that 1 lbs roll go walking across the desk (or onto the floor) in the middle of a tricky joint. This design comes from Phredie on Thingiverse.
"Pencil Cups"
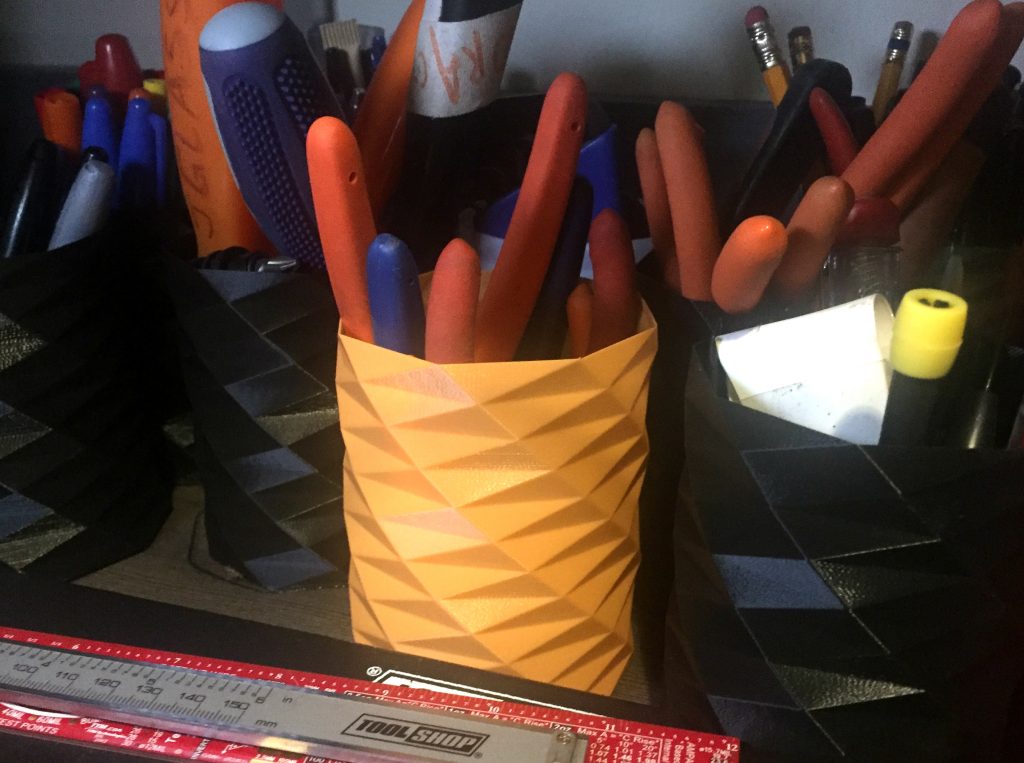
These multi-purpose cup was one of the first designs I ever printed, and it's still my go-to print for sampling the color of a new filament. It's meant to print in spiraled-contour mode, which means that the outer perimeter (after the base) prints in one continuous revolving motion, instead of stepping up layer by layer like a typical print. There are perhaps a dozen of these scattered around the apartment, but since the reorganization, most live just above my desk holding, individually: pens/pencils, colored sharpies, black/silver sharpies, screwdrivers, pliers, flush cutters, cutting tools, and misc tools.
The next improvement to my setup is definitely a lighting improvement - its not terribly bright in the room to start with, and the shade from the shelves doesn't help. 3D printing will be involved.
I also put my new setup to the test for the first time last night as I laid out a version of a DMX shield for the Arduino Pro Mini. Having all my tools organized and close at hand, and plenty of space to work it, makes working in my new setup a joy. The cleaning, the organization, the installing of new systems and setups: all worth it. It's now fun to sit at my workbench, instead of a kind-of cramped pain. Onward!